How to create a randomized font.
A randomized font is a font with more than one variant of each character in order to simulate true handwriting. For an authentic looking handwriting font you need to create at least three to four variants, the more the better.Font without randomization:
|
Font with randomization:
|
1. Follow the steps 1 to 11 of the tutorial 1 to create your basic font.
2. Print out your template as many times as the number of variants you wish to create. You don't need to fill out all fields, if for example, you don't want to create variants of a period, you can just leave the field blank.
It makes sense to create more variants of often used characters like "a" or "e" and less variants of seldom used characters like punctuation or numbers.
You also can create an entire new template with just the characters you wish to create variants of.
If you don't like a character you drew, you can delete it later, you don't need to restart filling out your template.
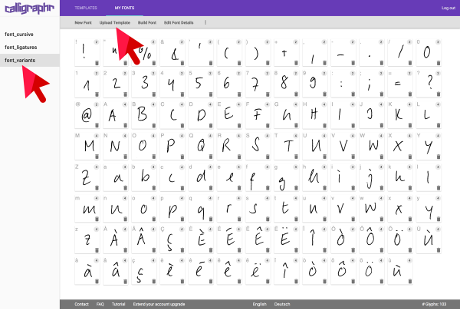
3. Go to “MY FONTS” on the main menu and select the font for which you want to create variants. Then hit "Upload Template"
4.
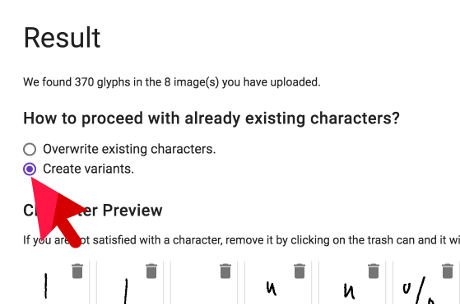
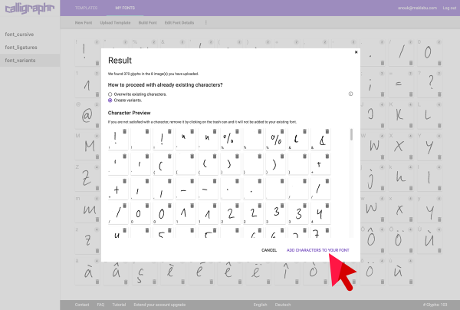
If Calligraphr detects that you are uploading a template containing characters you already have in your font it will ask you if you want to add this characters as variants to your font or if you want to replace the existing ones. "Create variants" is selected by default so you only have to click on "ADD CHARACTERS TO YOUR FONT".
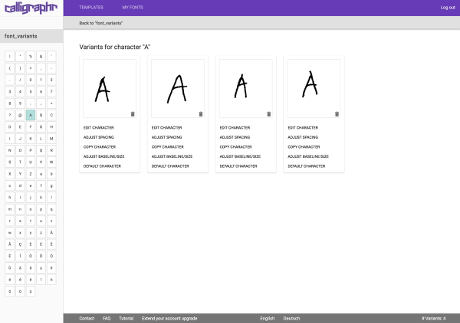
5. Click on a character of your choice and you will see all variants of it, you can edit, copy, and adjust them. If you don't like a character, just hit the trash bin to delete it.
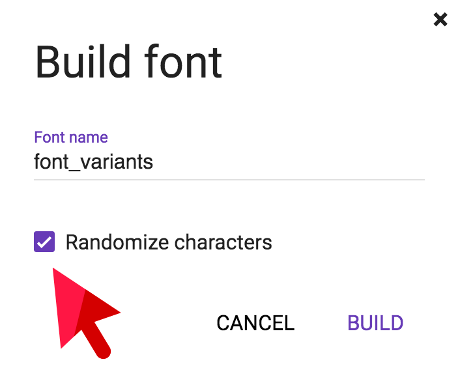
6. If you are happy with all of your characters you can go on an build your font just as you did with your basic font. On the dialogue the option to randomize your characters will be pre-selected. Your can proceed and hit "BUILD FONT".