How to create your first font.
This tutorial describes the minimum necessary steps to create a font.
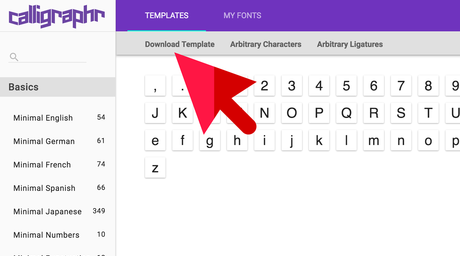
1. On the top menu click on «TEMPLATES».
2. In the left panel click on «Minimal English» and «Minimal Number».

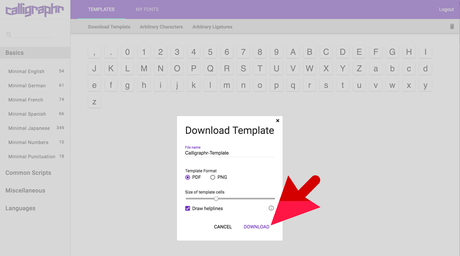
3. On the sub-navigation click «Download Template» and hit «Download» in the opening dialogue.
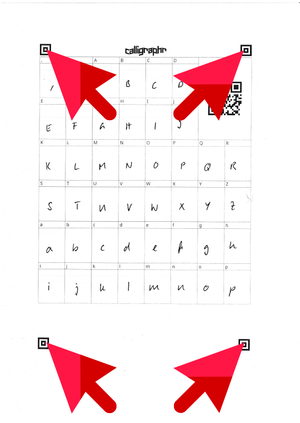
4. Print out the downloaded template and fill it out with a black pen.
A felt-tip pen works better than a ballpoint.
Place your characters like in the following image:

Scan the image or make a photo. Make sure the 4 markers on the border are included in your scan or photo.
A felt-tip pen works better than a ballpoint.
Place your characters like in the following image:
Scan the image or make a photo. Make sure the 4 markers on the border are included in your scan or photo.
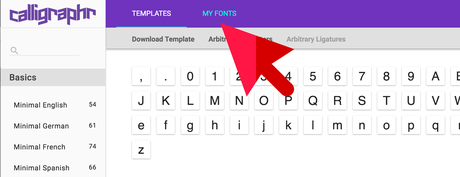
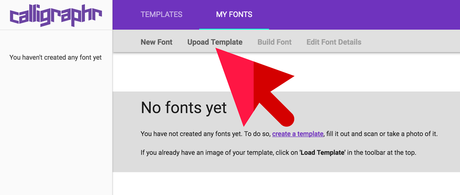
5. After scanning or taking a picture, go back to the app and click on «MY FONTS» in the main menu and then on «Upload Template» on the sub-navigation.
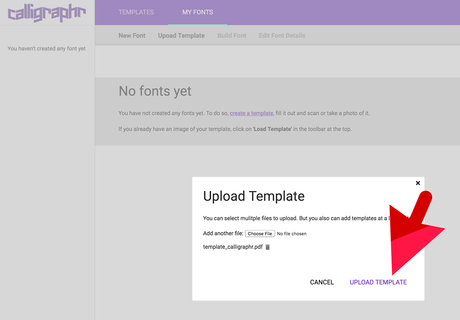
6. In the «Upload Template» dialogue use the «Select a file» button to select the image of your template and hit the «Upload Template» button.

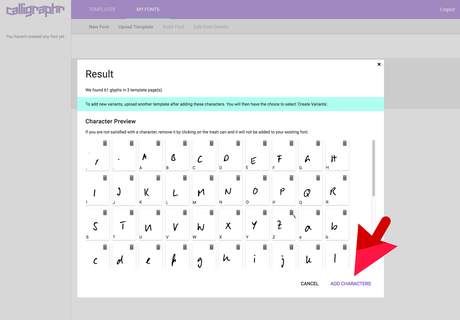
7. It will take a moment until the result dialogue appears. Click on the «Add characters to your font» button at the right bottom.
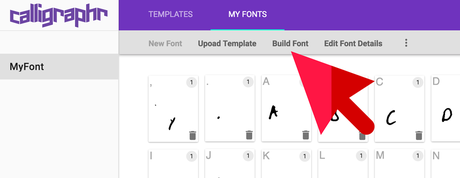
8. Your characters are now loaded into the app and you could go on and modify them or add other variants. But we will keep it simple for this tutorial, so we proceed to building a font.
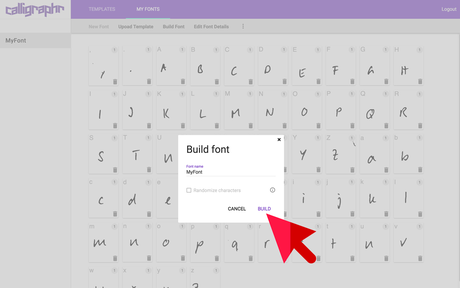
9. To do that click the «Build font» button and then the «BUILD» button.
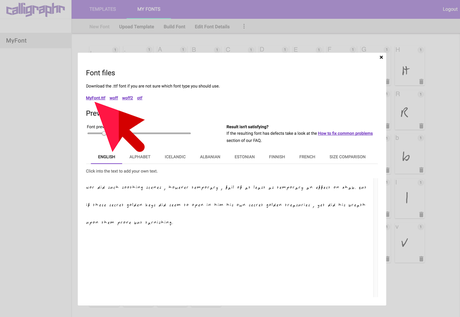
10. Wait until the result view is shown and check the result in the preview area. If everything looks fine, download the MyFont.ttf by clicking on it.
11. If you want to use your new font on your computer you first have to install it. The exact procedure of how to install a font on your system depends on if you use Windows or a Mac. For recent versions of those operating systems it is usually just a double click on the font file and then clicking on "Install font".